Understanding The Great Wave off Kanagawa with Simple Lines
Lesson Objectives: Students will learn how to use lines to create powerful waves inspired by Hokusai’s Great Wave off Kanagawa.
Time Required: 1 hour
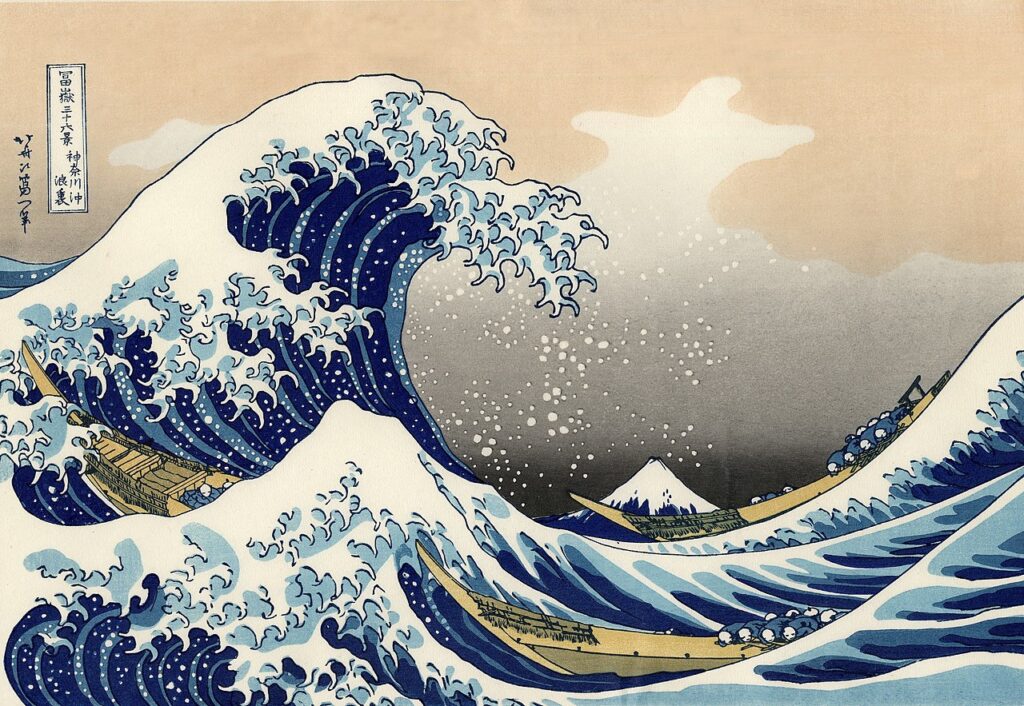
Artist: Katsushika Hokusai, THE GREAT WAVE OFF KANAGAWA, 1831
Materials:
9×12 White construction paper
Colored pencils in red, orange, yellow
Ultra fine Black Sharpies Pencils
Scratch paper
Black construction paper for matting (optional)
Presentation: Discuss line and Hokusai’s work, use the poster on Hokusai from the Art Prints available in the cabinet. Class presentation included here.
Procedure:
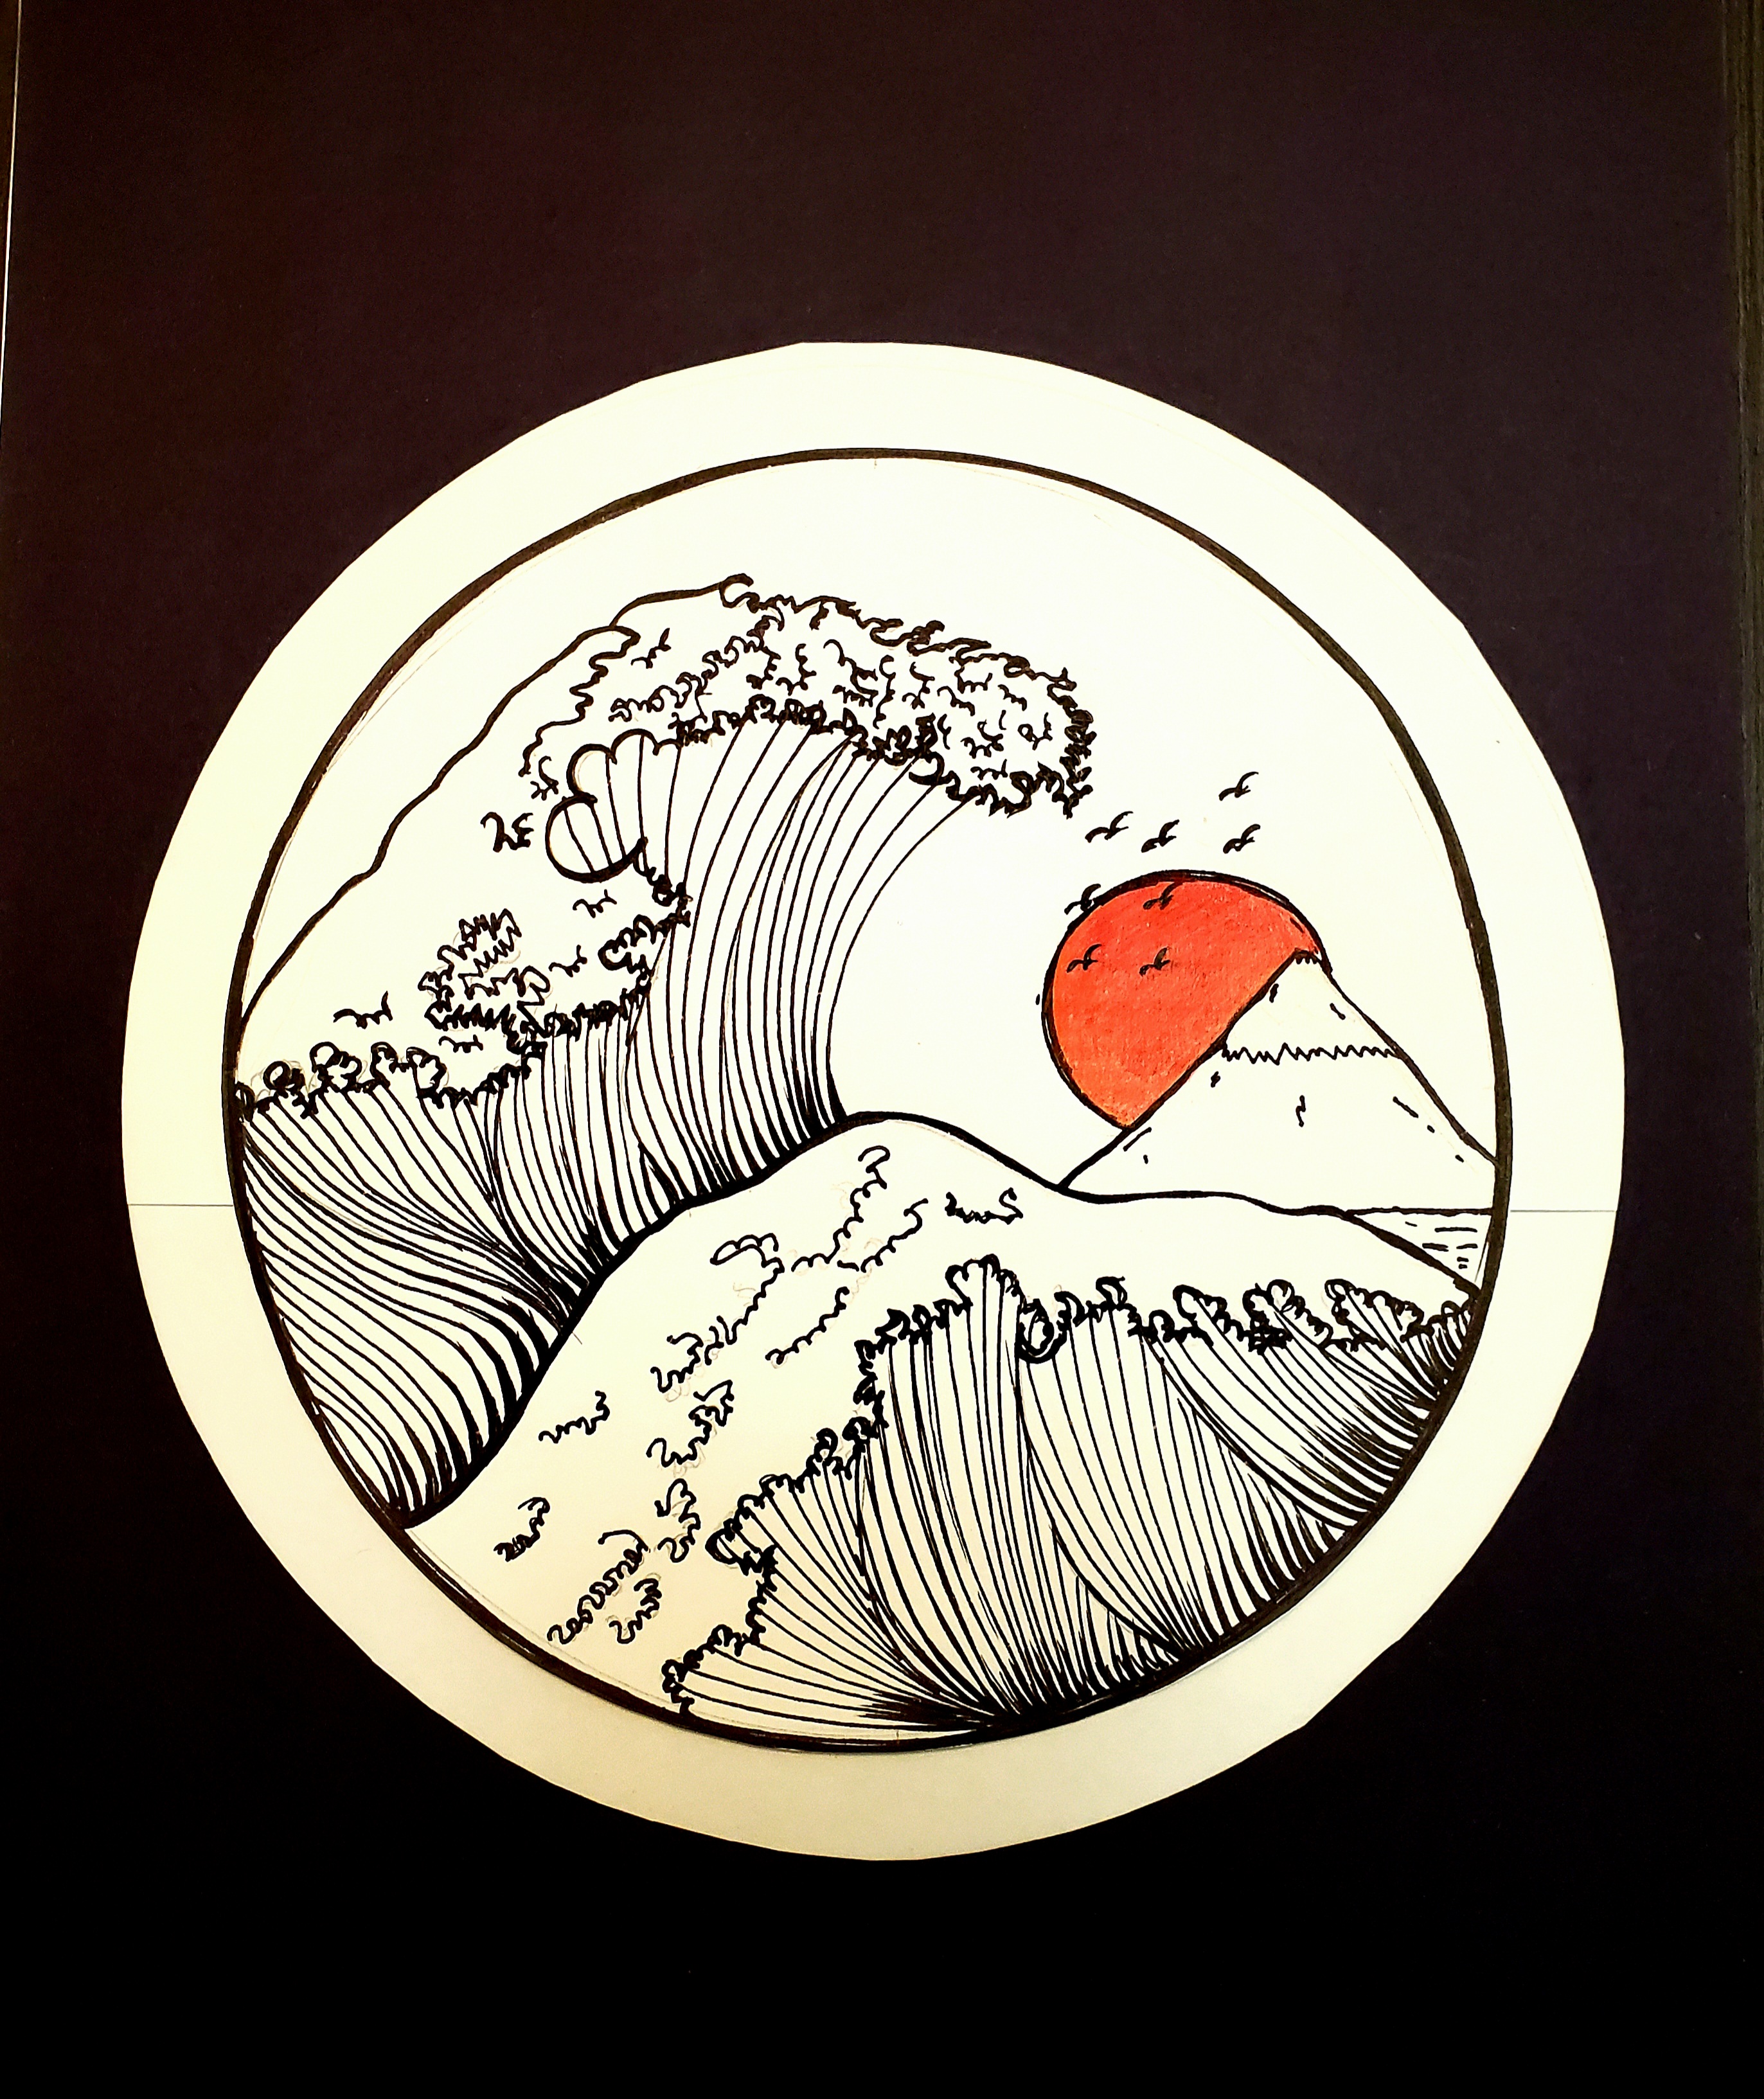
- Pass out white construction paper with a 7.5 inch circular frame pre-drawn on it with pencil. Write names on back. Oriention can be vertical or horizontal as it wouldn’t eventually matter as the artwork is drawn within the pre-drawn circle. We will be using pencils only up until step 9.
- On the scratch paper, practice curvy, contour and jagged lines for a minute or two.
- Once you feel comfortble with your lines on scratch paper, using jagged lines start drawing the outline of the foamy part of the big wave from left side of the circumference of the circle, anchoring the base of the wave just a little over the mid point of the circle.
- Complete drawing the foamy part of the big wave withjagged lines. Now draw a curved contour line on the right edge of the foam to give the big waveits shape and height.
- On the base of the big wave draw the foamy part of the wide flatter wave using jagged lines
- Now draw a sharp topped mountain on the right hand side of the flatter wave and a sun near it. You can be creative with your sun with it’s position or including rays.
- Now divide up each waves in 4/5 large segments using curvy lines going vertically.
- At this point erase any stray pencil marks you have and if your sketch outlines look satisfactory, pick up the sharpie.
- Using the sharpie, outline the foam, the wave and the mountain. You can outline the sun or choose not to.
- Now fill in each segment of the wave with vertical curvy lines. Use direction of curveture and angles to give each segment some variation, so that the waves come alive.
- add a few jagged, zigzag lines, coil/spiral lines on the foam partsof the wave to give it more details. a neck.
- Using the color pencils provided, color the sun in a bright warm color. The rest ofthe work will remain black and white.
** Optional: Matt the artwork using black heavy construction paper cutting a 8 inch circle in it using the Veriquest machine in the copy room.

