Understanding the element of shape and exploring abstract art
Lesson Objectives: Students will learn about the element of shape, and create abstract art in the style of Hilma af Klint.
Time Required: 1 session
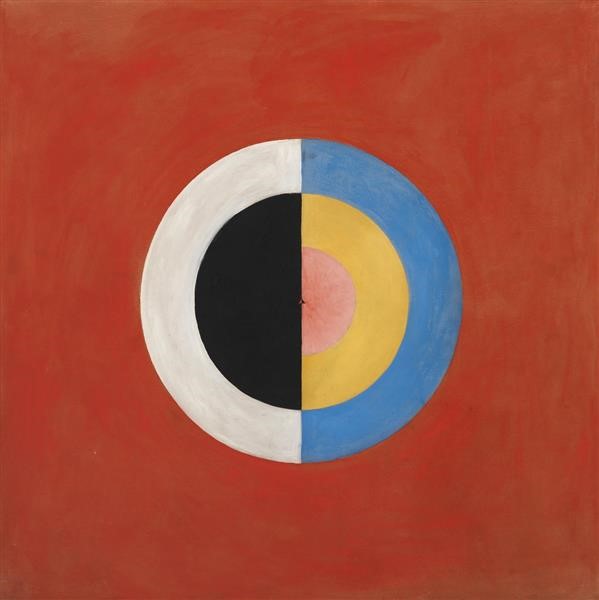
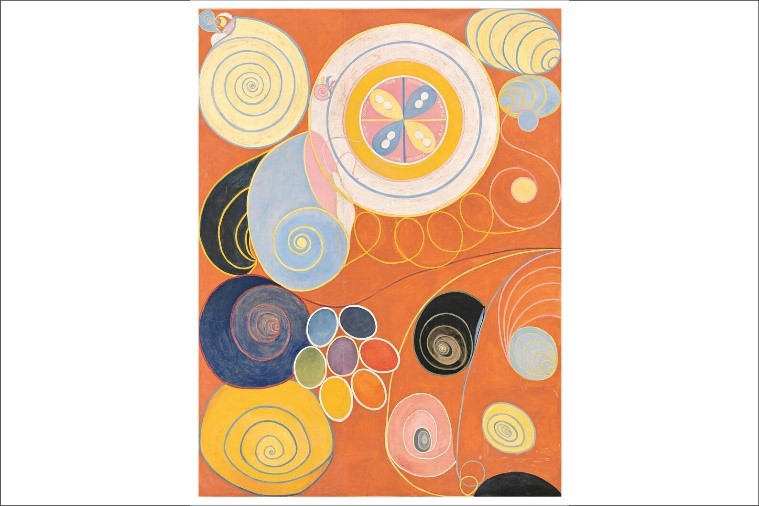
Artist: Hilma af Klint, 1862-1944; Paintings for The temple, 1906-1915
More sample images of the artist’s works in the PowerPoint presentation.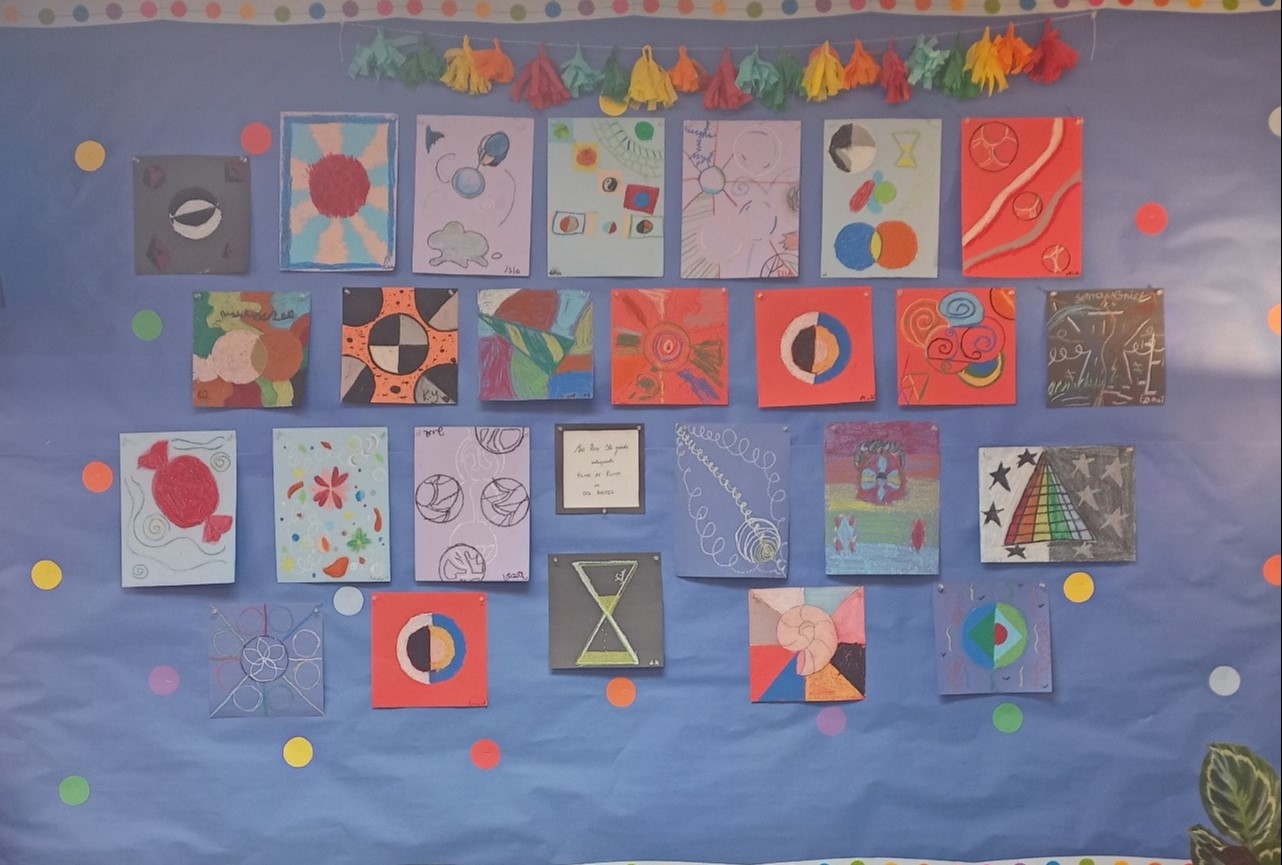
Student work on display in the office
Materials:
9×12 construction paper in a selection of colours (for example red, orange, light blue, light purple, dark blue)
9×9 construction paper in a selection of colours (dark blue, red, black, and maybe one more colour)
Oil pastels
Possibly coconut oil
Circle drawing aids (lids, cardboard circles, plastic cups or bowls, paper roll tubes, or compasses)
Scratch paper for cleaning dirty oil pastels (the 3 inch cut off from the square papers are excellent)
Presentation: Tell the class about Hilma af Klint, or show the video linked in the PowerPoint. Show some of her work or present the next two linked videos. Present the series called The Ten Largest and talk about the artist’s use of organic shapes. Present the series called the Swan and talk about geometric shapes, and how the artist started out with a figurative painting of actual swans in the first painting but abstracted them into geometric shapes in later paintings in the series. Present the series called The Five and point out that the artist used intuitive/automatic drawing, and it doesn’t matter that the circles are wonky or that shapes are asymmetrical, we still get the idea.
(Total video time for all 3 videos is 7 minutes, half of which is a sweep through the exhibition. Time for remaining presentation 5-10 minutes)
Finish by showing the slide with inspiration images and point out that in the rectangular paintings you find mostly organic shapes, but the square paintings have mostly geometric shapes. (Class presentation to link attached to the same e-mail.)
Procedure:
- Inform the students that oil pastels still work even if they are broken into pieces, and that dirty oil pastels can be cleaned by first drawing on a scratch paper, these are not reasons to ask for a different box of pastels.
- Remind the students that the artist practiced intuitive drawing, so they too should draw without thinking or planning too much.
- Leave the inspiration slide up for students to refer to, but encourage them to make their own art, rather than copy. If students want to copy, encourage them to pick their own colours, or pick elements from several paintings and combine in a new way.
- Let the students come up in table groups and choose their paper and pick up their oil pastels.
- Make those who picked a square paper aware that there are circle drawing aids available if they need them, and that the edge of the scratch paper can be used to help draw straight lines if they do not have a ruler. Remind them to share the drawing aids.
- Students can sketch with pencil first, especially if they are using a ruler or a compass to create geometric shapes; but if they are drawing intuitive organic shapes, they are encouraged to draw directly with oil pastels.
- Students will draw organic shapes on a rectangular paper, or geometric shapes on a square paper. They can also add squiggly lines, symbols, or illegible writing.
- The shapes will be filled in with oil pastel, and detail can be added with a different colour pastel on top if desired.
- Encourage students to draw and finish each shape before adding another shape as this will allow them to see the impact of that shape before deciding if they are finished or if they want to draw another shape.
- Oil pastels can be left as drawn, or they can be blended with a finger or a paper towel. If the pastels are dry and hard to blend, a minimal amount of coconut oil to dab on the finger will work wonders. The coconut oil will make a more noticeable grease stain on the back of the paper, but it will not affect the artwork.
(1/8 of a teaspoon would probably be more than enough for the entire surface of a 9×12 paper, give the student a tiny amount on the scratch paper and show them how to just dab their finger on it before using the same finger to blend. This does not work as well for blending with a paper towel.)
- Have students sign their work in the bottom right corner to ensure that the viewer can find which way is intended to be up. It’s not always obvious with abstract art.
- Have students pack up the oil pastels carefully, so that pieces are not falling out of the boxes. Have the student or a designated helper open any bulging boxes and fix the problem.
- Have students clean any rulers or similar tools used together with the oil pastels, as well as their desks. A good wipe with a paper towel or cleaning wipe is usually enough.
- Have students check the floor for any escaped oil pastels. Yes, check again please, oil pastels that are trodden into the carpet are hard to get out.
This project is one that can be finished pretty quickly by fifth graders, which is why we can indulge in videos in the presentation, and let the students have more choices in background colour and organic/geometric shapes.
If the classroom teacher usually includes information about the explore art project in their family communications, share the link to the virtual exhibit with the teacher. (Link on last slide of presentation) The teacher can share this with families to allow them to visit a virtual exhibit of 128 of Hilma af Klint’s paintings and notebooks from their home computer.

