LESSON PRESENTATION INSTRUCTIONS
VALUE
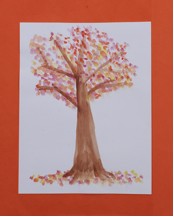
WATERCOLOR TREES
Lesson Objectives: Students will paint a realistic tree and its background using watercolors to see the different that can be made.
Time Required: 1 hour
Artist: John Constable, A View On The Stour Near Denham
Materials:
Watercolor paper
Watercolor paints
Paintbrushes
Dixie cups for water
Paper towels
Presentation:
Discuss what value is. Talk about how with line you can draw a thick trunk of the tree and thin lines to make its branches. What kind of tree does this make? Fall or winter? Show them examples of spring trees. Show through time the trees leaves get bigger so the tree gets bushier. Point out how the leaves make a roundish shape on top of the trunk. Demonstrate how to use watercolors the right way. Remember you will be teaching this to kids probably for the first time so go slow and show every little detail: what water does to the paint, how to hold a brush, how to stroke a brush, how to wipe off a brush, etc.
Procedure:
- Hand out the watercolor paper and the other supplies. Have them write their names on the back.
- Place their paper vertically. Discuss how we want the top of the tree to fill the upper portion of our paper. Paint a blob of light green on top of your page to represent the tree top. Slowly add more color to get the darker values of the tree top. NOTE: The more water you have, the lighter in value the color is. The less water you have, the more concentrated the color is, resulting in a lower value.
- Now have them paint the trunk. Remind them that you don’t just see brown in the truck but red and orange.
- Next go back to the green and paint the ground, meanwhile pointing out the horizon line should come up behind the tree trunk.
- Finally include the sky using blue and purple values. Making sure to start out light. Add lots of water.
- Put them on the drying rack and mount them later.

