LESSON PATTERN INSTRUCTIONS
FORM
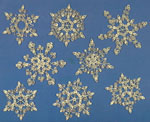
QUILLED SNOWFLAKES
Lesson Objectives: Students will learn about form by making a design using a paper quilling technique.
Time Required: 1 Session
Artist & Print: Jen Stark, Trinity
Website: http://www.jenstark.com
Materials:
Small pieces of scratch paper
Sheets of blue construction paper
White paper cut into thin strips (use a shredder!)
Toothpicks (one per child for rolling the paper round, one for dabbing glue)
Elmer’s Glue in small pots
Printouts of the instructions in the binder
Presentation: Discuss form, materials used in sculptures, paper sculpture, and quilling. See handout in binder.
Procedure:
1. Practice making the shapes on the sheet on the next page.
2. Draw your snowflake design on scratch paper (remember that snowflakes have six points so you need to make six of each part of your design).
3. Roll the shapes for the center part of your design and use small dabs of Elmer’s glue to stick them onto the blue paper.
4. Use full strips for large shapes and half strips for small shapes.
5. Continue to make the shapes of your design and work outward until your snowflake is complete.
NOTE: You can also make other designs, such as a turtle, an underwater scene, or a field of flowers. See sample book for other ideas.


