LESSON PRESENTATION INSTRUCTIONS
COLOR
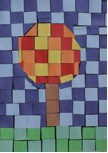
MOSAIC TREES
Lesson Objectives: Students will explore warm and cool colors while creating a mosaic landscape.
Time Required: 1 hour
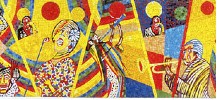
Artist: NYC Subway Art http://www.nycsubway.org/perl/artwork
Vincent Smith, Minton’s Playhouse-Movers and Shakers
Materials:
Black paper 9 x 12
Blue, light blue, green, light green, red, orange, yellow, and brown construction paper cut into 1 inch squares
Glue
Scissors
Presentation:
Discuss what warm (red, orange, yellow) and cool (blue, green, purple) colors are. How do they make you feel? How do artists use warm and cool colors to express emotion?
Procedure:
- Pass out black paper. Hold it vertically. Names on back.
- Using a white piece of chalk or colored pencil, draw a circle about 2/3 to 3/4 of the way up the page to represent the tree.
- Starting at the bottom, glue down green and light green squares to make grass. Show how to leave small gaps between squares. As you near the edge of the page, you may need to trim the squares with scissors to make them fit.
- Use brown squares to make a trunk up to the bottom of the drawn circle.
- Use the blue squares for the sky.
- Use the warm colors (red, orange, yellow) to make a fall tree. Trim squares into smaller pieces or triangles to navigate around the circle.
- Mount and return to students.


