LESSON PRESENTATION INSTRUCTIONS
SPACE
Lesson Objectives: Teach students how to create linoleum printing blocks using lessons of line, space and color.
Time Required: Two separate lessons, at least 60-90 minutes each. First one is to make the design and cut the blocks. Second lesson is for printing and painting the background.
Artist: Gustav Klimt http://www.gustav-klimt.com, Tree of Life http://www.gustav-klimt.com/The-Tree-Of-Life.jsp
Materials (Day 1):
- Linoleum printing supplies (see linoleum printing info)
Materials (Day 2):
- Transparency sheets, 1-2 per student
- Different colors of cut paper for making additional prints
- Watercolor paper / watercolor paints
- Could also use tissue paper and apply with glue/water mixture to regular paper.
- Brayers and ink
Presentation:
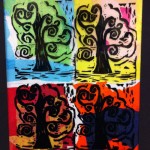
Discuss Klimt’s “The Tree of Life” painting, lino printing technique, positive/negative space
Procedure, Session 1:
1. Students create their own interpretation of Klimt’s tree, drawing a sketch on scrap paper, then transferring design to lino block. Carve block.
Procedure, Session 2:
1. Students will practice in regular paper to make sure their print is how they want it and their printing technique is perfected. When ready, make 1-2 prints on transparency sheets.
2. Students will create a background for their transparency print. Two options: paint on watercolor paper, using the transparency to plan out the colors they want to show through (make sure transparency print is dry first). Second option is to use a thin mixture of glue and water and apply pieces of tissue paper in blocks of color behind the transparency.


