LESSON PATTERN INSTRUCTIONS
TEXTURE
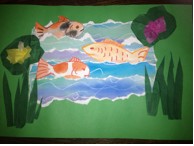
KOI POND
Lesson Objectives: To teach students how texture is used in art.
Time Required: 1 hour
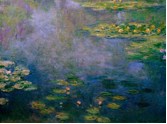
Artist: Claude Monet, Water Lilies, 1916 (available online) Source: http://www.dickblick.com/lesson-plans/koi-pond/
Materials:
Two sheets of watercolor paper per child
Large Green sheet of paper
Watercolor paints (blue, turquoise, green, purple for water; orange, yellow, black for fish)
White Crayon
Orange, black, yellow, red crayons to draw fish
Large watercolor brush
Tissue paper (green, colors for flowers)
Glue/glue sticks
Pencil
Presentation:
Describe different ways texture is used in art. Show examples and talk about how it enhances the artwork. Show what Koi fish look like so they will be able to paint them. Talk about their importance in Japanese culture.
Procedure:
1. One one sheet of watercolor paper, draw wavy lines with the white crayon. Then paint with a selection of “pond” colors: blues, greens, purple.
2. While that sheet dries draw three fish on the other sheet using red, yellow or orange crayons. Add eyes, mouth, gills, etc. Paint over crayon with colors of Koi fish: yellow, orange, black, red. Cut out fish.
3. Tear the first sheet of paper lengthwise into five or six horizontal strips. As the paper tears, it will create a rough, white edge that will look like waves on the pond. Tear ends of the strips as well so the sides of the pond are same as the top and bottom. Over lap the strips about ¼ inch and glue to large green sheet of paper. Leave the top edges loose so the fish can be slipped in the waves.
4. Add the fish and glue down, tucking part of them under the strips of water.
5. Using tissue paper, tear or cut paper circles for the lily pads. Use crumpled pieces of colored tissue to make the flowers. Tear or cut strips of green tissue for the tall grass at the edges of the pond. Glue down.


