LESSON PRESENTATION INSTRUCTIONS
PRINTMAKING
ED EMBERLEY PRINTMAKING
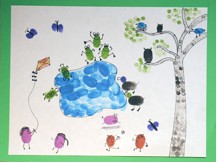
Lesson Objectives: Student will learn about printmaking and use their own thumb and fingers to make prints to create a picture.
Time Required: 1 hour
Artist: Ed Emberley, Ed Emberley’s Complete FunPrint Drawing Book (in Explore Art room)
Materials:
White construction paper 9×12 or 12×18
Ink pads
Wet Ones or diaper wipes
Fine black Sharpies
Photocopies of some examples from his book for each table group
Presentation:
Discuss printmaking. Show how to make good prints with thumb and fingers by pressing into an ink pad, placing just the tip of the finger onto a piece of paper, press hard without sliding or wiggling, and then lift straight up. Show how Ed Emberley uses thin black Sharpies to create facial expressions and detail.
Procedure:
- Pass out paper. Write names on back.
- Either give children free reign or decide on a theme (farm, travel, seasonal etc.).
- The students can make their own scene with their prints.

