LESSON PRESENTATION INSTRUCTIONS
LINE
DEER
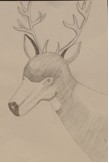
Lesson Objectives: Students will learn how to draw a deer step by step using the shape technique.
Time Required: 1 hour
Artist: Marc Franz Deer in the Forest
Japanese Kyoto School, Deer, Pine and Bat
Materials:
Sketch paper and exercise paper
Pencils and erasers
Presentation:
Discuss the artist and also the print. Show different deer on the overhead and talk about the deer showing muscles and the body line. Do a demonstration on how the figure of an animal can be broken down into a variety of connected shapes, with particular focus on proportion.
Suggested questions:
Looking at the print would you think this is a realism painting? Abstract, what is it? Do the animals blend into the environment? Does the scene remind you of anything? How do the animals show line? Talk about their bones. Are animals all made of shapes like ovals, circles rectangles, triangles and squares? Why do we use shapes? What does the word proportion mean?
Procedure:
- Hand out the exercise paper. Practice sketching: not pressing down hard, but loosely, lightly drawing.
- Hand out good paper and write name on back.
- Have the students draw with you one step at a time using shapes. (head, snout, neck, ears, antlers, eyes, and nose)
- After all the shapes are made show them how to use lines to connect them to create their deer head. (Make sure you talk about how to make things look in front to show that it is near, i.e. the front ear.)
- If you have time teach how to shade: Establish a light source off to one side of the paper. The object’s features closest to the light source will be lit, but the object’s features farthest away from the light source will be shadowed. You can draw this by shading the side farthest from the light source.

