LESSON PATTERN INSTRUCTIONS
TEXTURE
WIND CHIMES
Lesson Objectives: Students learn how to create texture on clay surfaces while making a wind chime.
Time Required: 2 days: 1- 1 ½ hours for Day 1, 1 hour for Day 2 (glazing)
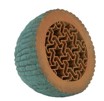
Artist: Graham Marks, Gourd Shaped Sculpture, Untitled Podlike Form, Untitled, 1976
Clay
Texture tools
Cookie cutters (in clay cabinet)
Metal shower curtain rings (purchase at Home Depot)
Twine (not thread- needs to be sturdy and thicker to hold chime pieces)
Plastic beads if desired (check Miscellaneous bin in EA room)
Wooden skewers to make holes
Materials (Day 2):
Glaze
Paintbrushes
Dixie cups
Presentation:
Show sample, discuss how to create texture on clay surface, what shapes to cut out for chimes and top.
Procedure, Session 1:
- Roll out slabs of clay, one per child. Each student will make four individual chime pieces and one base piece that is slightly larger than the chimes pieces. You can use any shapes you desire- helpful to have large cookie cutters, or use table knives or clay tools to carve out shapes.
- Using a skewer, poke a hole through the individual pieces for the twine. You will make four holes in the base for the top. Create texture in each piece. Can also apply add-ons.
- Allow clay to dry for 14 days, then bisque fire in the kiln.
Procedure, Session 2:
- Glaze can be applied to both sides of all pieces, but you will need to use stilts in the kiln so the pieces don’t stick to the kiln shelves.
- Use 2-3 coats for vibrant colors.
- Glaze fire in the kiln.
STRINGING:
- Cut two long pieces of twine, about 3-5 feet long, depending on how long you want the chime pieces to hang down. Fold in half and loop over metal shower curtain hook, tightening the loops.
- String the twine through the four holes. Determine where you want the base to sit below your hook. Tie one or two knots in the twine immediately under the base holes to hold it in place.
- Add beads before tying on the chime parts. You can tie a knot at the end of the beads so they don’t drop down, or you can allow them to drop. Tie a knot in the end after threading twine through the hole in the chime piece. Cut off excess twine.


