LESSON PRESENTATION INSTRUCTIONS
TEXTURE AND FORM
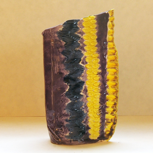
CLAY SLAB VASE
Lesson Objectives: Students learn how to create texture on a slab, then make a vase from the slab.
Time Required: 2 sessions, 60 minutes each
Artist: Edgar Degas, The Little Dancer of 14 Years, after 1922 (available online)
Materials (Day 1):
Clay slab for each student
Tools to create texture
Materials (Day 2):
Glaze
Paintbrushes
Dixie cups
Presentation:
Show students how to create texture from tools: uncooked pasta, kitchen utensils, Lego blocks, leaves, buttons, heavy string, clay stamps, etc.
Procedure, Session 1:
1. Roll out slabs, one per student. Students will cut a rectangular shape from the slab (doesn’t have to be perfect).
2. Using a collection of the materials listed above, show students how to create texture on the slab. Roll or press uncooked pasta to create a regular pattern. Students can use anything they want, and can even apply add-ons if they like.
3. When the students are satisfied with their slab, have them pinch the two edges together along the side, scoring and wetting the two ends that will come together. Once the ends are securely attached, set aside. Students will make the bottom by rolling out a small piece of clay. Stand the vase on the clay and cut around the base with a clay tool or knife. Score the spaces where the clay will meet the base and use water or slip to attach securely. Make sure you check each vase to be sure it will be watertight.
4. Dry for two weeks, then fire as usual.
Procedure, Session 2:
1. Glaze inside and out, but not the bottoms. Use 2-3 coats for vibrant colors.
2. Let dry overnight. Glaze fire in the kiln.


