LESSON PRESENTATION INSTRUCTIONS
SPACE
SNOWMAN PERSPECTIVE
Lesson Objectives: Student will learn about perspective and how to use space (in art) to create it.
Time Required: 2 days: Day 1: 1 hour, Day 2: a few minutes (can be combined with another lesson)
Artist: Charles Russell, The Horse Thieves
Source: http://www.deepspacesparkle.com/2009/02/08/adorable-close-up-snowman-painting/
Materials (Day 1):
Canvas 8×10
Black oil pastel
White, orange, and other colors of tempera paint
Paper plates or paint trays
Paintbrushes: large and small
Materials (Day 2):
Black oil pastel
White tempera paint
Paper plates or paint trays
Q-tips
Presentation:
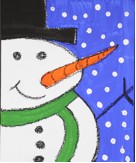
Discuss the meaning of space in art: the illusion of a 3-dimensional object or objects created on a flat, 2-dimensional piece of paper. Painting a snowman so that it appear closer to you would look different than if you were painting a big snowman. For a big snowman, you’d still see all his parts, but the closer something gets to you, the less you see in your field of vision, so you might only see part of a snowman. Objects in art that are closer to you also show a lot of detail.
Procedure Day 1:
- Pass out canvases. Write names on back. Orient vertically.
- Draw a sideways letter “U” down on the left side of the paper, about a hand’s width down. This will be the head.
- Draw a hat on top of the curved line. Hat options may vary: top hat, baseball hat, beret, etc.
- For the body, draw a curved line from the bottom of the sideways “U” to the bottom of the paper.
- Add a carrot nose that extends beyond the line of the face.
- For the scarf, draw another curved line that follows the neck line. For the scarf tail, draw a curved line down or along the belly.
- Paint the snowman with white paint.
- Paint the hat, scarf, and carrot nose.
- Using the wooden end of a paintbrush, dot on black eyes and buttons.
- Let dry.
Procedure, Day 2
- With black oil pastel, outline the snowman, scarf, and nose. Add a mouth and branches for arms.
- With a Q-tip, make white dots for snowflakes.

