LESSON PRESENTATION INSTRUCTIONS
FORM
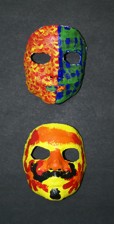
PLASTER MASKS
Lesson Objectives: Students will understand the importance and relevance of masks in African culture. An understanding of form as it relates to sculpture is demonstrated.
Students will create and design a three dimensional mask using their own face as a model.
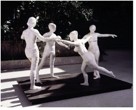
Artist: African, Nigeria, Yoruba Peoples, George Segal, Dancers (available online)
Time Required: 2 Sessions
Materials (Day 1):
6 rolls of plaster strips, ¾” thick (30 strips per student)
Dixie cups with petroleum jelly and a popsicle stick in each
Hair bands/bobby pins
Newspaper to cover desks
Low trays/bowls for dipping plaster strips (flat bottom)
Scissors to cut individual strips for fitting
Paper towels
Paper plates
Sharpie to write names inside of masks and on plates
Hand towels from home for around their necks
Materials (Day 2):
Paintbrushes (thick and thin)
Cups for water
Acrylic paint
Newspaper for desks
Paper towels
Presentation:
Discuss masks. George Segal is a sculptor and a painter associated with the Pop Art movement. He uses plaster bandages and live models to create full human figures.
Procedure, Session 1:
- Kids need to get in pairs. Have them pull hair back away from face. They will need to decide if they want their eyes covered or not. Put petroleum jelly LIGHTLY around frame of face and on hair (eyebrows/above lip) so that you don’t pull hair off when masks harden. Students can sit with backs of chairs against desks so they can lean their heads back onto the desks or they can lie flat on the floor.
- You will need to wet strips enough so they are soft, lightly “squeegee” them between fingers so they aren’t dripping, and apply on face. Go around the frame of face, just below chin, smoothing strips out with finger between strips. Fill in the face vertically, making sure layers overlap slightly so that they are connected. Go around the outline of the face again, then apply a second layer of strips horizontally across the face. Apply strips to mouth and eyes last. NO TALKING OR LAUGHING WHEN THE MASK IS ON. Drying time is approx. 5-10 minutes or you can hasten drying with hair dryers.
- Adults should check if dry and slide fingers around edges of mask to loosen before removing. Place on plate. Mask will take 24-48 hours to dry.
Procedure, Session 2:
- Paint masks in preferred colors. Let dry on plates.
OPTION:
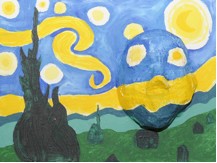
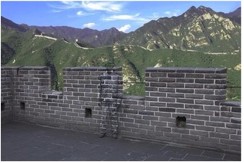
In between sessions, parents can caulk masks onto 12×18 canvas either in the center, left, or right (students may choose). Paint mask and canvas with gesso to prime. Introduce the artist Lui Bolin and camouflage to the students at the beginning of the 2nd session. Lui Bolin paints himself into the picture. (Can you see him in the painting?) Students may paint a scene with the mask as part of the scene.


