LESSON PRESENTATION INSTRUCTIONS
FORM
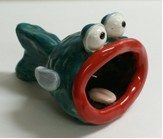
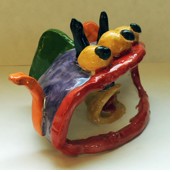
PINCH POT FISH OR MONSTERS
Lesson Objectives: Students create a fun fish while practicing a variety of hand building techniques. Students exhibit an understanding of hand building techniques and vocabulary such as: pinch pot, coil, add-on, join, score, slip.
Time Required: Two sessions, 1 hour each
Artist: Pablo Picasso, Baboon and Young
Materials (Day 1):
Clay
Brown paper bag or cardboard placemats
Small cups or lids of water
Clay tools
Materials (Day 2):
Glaze
Paintbrushes
Dixie cups
Presentation:
Discuss form. Discuss slab, coil, pinch pot, and scoring techniques.
Procedure, Session 1:
- Distribute clay – approx. 1 lb per student. Have extra available.
- Students should divide their clay, using about ½ to ¾ lb. to make a pinch pot for the body of the fish. Remaining clay is set aside for joined pieces.
- Form a pinch pot with walls approximately ½” thick. If the walls are too thin, the pot will not be able to hold its shape. (Balled newspaper can be inserted into pot to hold shape while drying). Shape and smooth the pinch pot to the desired shape and position as the base form of the fish or monster.
- Tools should be used at a minimum but can be offered to create texture before adding on additional pieces
- Students will use remaining clay to form a coil for the mouth, tail to stabilize the pot on its side, and additional desired details (eyes, fins, etc.). For aliens or monsters, anything goes! Emphasize the importance of joining pieces well. You should be able to tug on any joined parts without them separating from the base unit.
- Have students impress their initials on the bottom of the fish with a toothpick or pencil. Suggest adding the year. Check for duplicate initials.
- Use balled up newspaper to support mouth of fish if desired.
- Let dry 14 days, remove newspaper, and bisque fire in kiln.
Procedure, Session 2:
- Provide a wide variety of color choices.
- Remind the students that glaze should only go where the eye can see without lifting the piece. While painting, rotate the piece by turning the placemat.
- Don’t get glaze on the bottom! Or use stilts in the kiln to prevent glaze from coming into contact with the kiln shelves.
- Let dry overnight and glaze fire in kiln.


