LESSON PRESENTATION INSTRUCTIONS
FORM
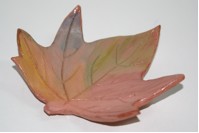
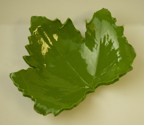
LEAF BOWLS
Lesson Objectives: Students use a real leaf to create a ceramic dish. Students are introduced to the technique of clay slab. Form is recognized when 3 dimensions are present (height, length, and depth).
Time Required: 2 sessions
Artist: Dorothy Torivio, Ceramic Vessel, Fall Leaves Fall! by Zoe Hall (book)
Materials (Session 1):
Clay
Fresh leaves
Brown paper bag or cardboard placemats
Rolling pins
Clay cutting tools or plastic knives
Water
Materials (Session 2):
Glaze
Dixie Cups
Paintbrushes
Presentation:
Read suggested book and identify large fresh leaves. Discuss the characteristics of form.
Procedure (Session 1):
- Students begin with a fist-sized lump of clay that is rolled and flattened into a ¼ inch thick slab large enough to surround the leaf they are working with.
- Press the leaf into the slab of clay and check a section to be sure that the leaf’s veins etch deeply enough to leave a good impression.
- Cut around the perimeter of the leaf shape with a butter knife or clay tool removing excess clay and gently rub the edges to smooth. Remove leaf.
- Have the students cup the imprinted leaf gently in one hand so the edges curl up on the sides to create a dish shape.
- Carefully impress the student’s initials on the back. Clay is then left until bone-dry: 14 days.
- Bisque fire in the kiln.
Procedure (Session 2):
- Paint with glaze. Using 2-3 coats of glaze will result in a more vibrant color.
- Don’t get glaze on the bottom! Or, use stilts in the kiln to keep the glaze from coming into contact with the kiln shelves.
- Let dry overnight and glaze fire in the kiln.


